Saturday, October 17, 2020

How to Fix Microsoft Office Setup Bootstrapper Has Stopped Working

How to Fix Microsoft Office Setup Bootstrapper Has Stopped Working

Microsoft Office is still successful today. There are differing opinions as to why Microsoft Office remains popular even though alternatives have been available for a long time such as Apache OpenOffice and LibreOffice. Both alternatives are free and have been around for many years, but they still can't dampen the popularity of Microsoft Office, which has a high license price.

An analyst from Gartner named Michael Silver suggests that documents created with a software will look different when opened with other software. In other words, one of the reasons Microsoft Office is still popular is compatibility issues.

A document created in Microsoft Excel may be slightly different when opened in LibreOffice. For individual users, the problem may not have a big impact, but it is a different story for the business world, especially large companies that have thousands of documents.

Features are not seen as the main culprit that keeps many people choosing Microsoft Office. The reason is, not everyone uses all the features that Microsoft Office has. Most of the Microsoft Office features are also available in LibreOffice and OpenOffice.

How to Fix Microsoft Office Setup Bootstrapper Has Stopped Working


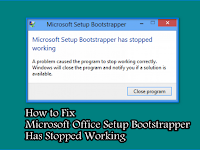
Problem after problem that arises in succession in Microsoft Office also doesn't reduce its popularity at all. One of these problems can even make the Microsoft Office installation fail time and time again. The installation process suddenly stops accompanied by a notification that Microsoft Office Setup Bootstrapper Has Stopped Working.

How to Fix Microsoft Office Setup Bootstrapper Has Stopped Working
 
If you currently have this problem, Microsoft Office will still not be able to install no matter how many times you try. But if you try it on another computer, Microsoft Office will probably install without any problems. There is no need to be confused, because such problems can be overcome in the way that we describe below.

1. How to Fix Microsoft Office Setup Bootstrapper Has Stopped Working Use Microsoft Support and Recovery Assistant

There are times when you uninstall Office applications for certain purposes, such as installing a newer version of Office applications. If you have problems uninstalling Office applications, then you need a tool called Microsoft Support and Recovery Assistant.

First you need to download the Microsoft Support and Recovery Assistant tool. You can download it via this link.

When finished downloading, then install the Microsoft Support and Recovery Assistant tool.

After the installation is complete, then run the Microsoft Support and Recovery Assistant tool. Then an agreement window will appear as shown below, then select I agree.

How to Fix Microsoft Office Setup Bootstrapper Has Stopped Working Use Microsoft Support and Recovery Assistant

Here we need to uninstall the Office applications that were previously installed on your laptop. Therefore, select Office then select Next.

How to Fix Microsoft Office Setup Bootstrapper Has Stopped Working Use Microsoft Support and Recovery Assistant

Next select I have Office installed, but I'm having trouble uninstalling it. Then select Next.

How to Fix Microsoft Office Setup Bootstrapper Has Stopped Working Use Microsoft Support and Recovery Assistant

In the Is this the affected machine? please select Yes then select Next.

How to Fix Microsoft Office Setup Bootstrapper Has Stopped Working Use Microsoft Support and Recovery Assistant

Select the Office product you want to uninstall by checking it and then selecting Next.

How to Fix Microsoft Office Setup Bootstrapper Has Stopped Working Use Microsoft Support and Recovery Assistant

Wait for the Office application uninstall process to complete.

How to Fix Microsoft Office Setup Bootstrapper Has Stopped Working Use Microsoft Support and Recovery Assistant

Check the option I have saved all my work, closed open Office applications and stopped any other setup program.

How to Fix Microsoft Office Setup Bootstrapper Has Stopped Working Use Microsoft Support and Recovery Assistant

Then select Restart and the Office application has been successfully uninstalled from your laptop.

How to Fix Microsoft Office Setup Bootstrapper Has Stopped Working Use Microsoft Support and Recovery Assistant

After you please reinstall the Office application with the version you want.

2. How to Fix Microsoft Office Setup Bootstrapper Has Stopped Working using Registry Editor

To solve Microsoft Office Setup Bootstrapper Has Stopped Working, we can use a built-in Windows tool called Registry Editor. The steps can be checked below:

Click Windows key + R then type regedit and select OK.

How to Fix Microsoft Office Setup Bootstrapper Has Stopped Working using Registry Editor

If you get a notification like this, just select Yes.

How to Fix Microsoft Office Setup Bootstrapper Has Stopped Working using Registry Editor

Go to the HKEY_LOCAL_MACHINE\SOFTWARE\Microsoft\Windows NT\CurrentVersion\AppCompatFlags folder.

How to Fix Microsoft Office Setup Bootstrapper Has Stopped Working using Registry Editor

Whatever you do to the registry files, it's better if you do a backup first. Right click AppCompatFlags then select Export.

How to Fix Microsoft Office Setup Bootstrapper Has Stopped Working using Registry Editor

Then Save the backed up file to the desired folder.

How to Fix Microsoft Office Setup Bootstrapper Has Stopped Working using Registry Editor

Here we will delete the AppCompatFlags folder by right clicking then selecting Delete.

How to Fix Microsoft Office Setup Bootstrapper Has Stopped Working using Registry Editor

After that, reinstall the Office application with the version you want.

To use Microsoft Office, you don't actually need to buy a license because Microsoft already provides a free version that can run as long as you have an internet connection. It has fewer features, of course, but you can create simple documents without paying a dime. For example, to do a coursework in the form of reporting, you most likely don't need Microsoft Word's advanced features.

Using the free Microsoft Office Online is a better solution than using the pirated version. Malware always lurks behind pirated software. Who knows, maybe your computer has actually become a zombie computer that was used to launch DDoS attacks on a server.

With Microsoft Office Online, you can also avoid common problems in Microsoft Office such as "Microsoft Office Setup Bootstrapper Has Stopped Working". Your time can really focus on getting work done. In addition, files created in Microsoft Office Online are also automatically stored on OneDrive so you don't need to do backups anymore.
How to Clone Windows 10 to HDD or SSD

How to Clone Windows 10 to HDD or SSD

Cloning is a way to duplicate or duplicate data from one hard drive to another. For example, hard drive A already has a complete operating system and programs. While hard drive B is still empty or not filled with the program at all.

How to Clone Windows 10 to HDD or SSD

So, by doing the Cloning process, for example from computer A to computer B, then you will get the contents and appearance of computer B that are exactly the same as computer A. So this cloning process is a very efficient and effective way compared to having to install the operating system and its programs one by one. on computer B which will take a while.

How to Clone Windows 10


There are several ways to clone Windows 10. One of them is by using an additional application. Some of the applications commonly used to clone a hard drive or Windows 10 are Acronis Director, Clone Disk, EaseUS Todo Backup, and so on.

Actually, the way to do cloning is quite easy, even though carefulness is needed. Because the process is sequential and not in the least bit long. But not as long as you install a new operating system. In this article, we will discuss how to clone Windows 10 using the EaseUS Todo Backup application.

The EaseUS Todo Backup application is an application that has a very powerful utility for its users. This application has various benefits such as backing up data, cloning or completely copying the operating system. This application has two versions, namely the free version and the premium version, aka paid. However, the free version actually fulfills your primary needs. Just follow the steps below.

1. Please download and install the EaseUS Todo Backup application first. You can download this application on the official website.

2. Then run the EaseUS Todo Backup application, then you click Start Now. As shown in the image below.

How to Clone Windows 10 to HDD or SSD

3. If you have a license code, please fill in it, but if you don't have it, just click Later.
 
How to Clone Windows 10 to HDD or SSD

4. Please click the triple line icon on your left. Then, please select System Clone. As shown in the image below. But, make sure before you start, either SSD or HDD storage has been installed with a partition that is completely new or completely empty and does not have a partition.

How to Clone Windows 10 to HDD or SSD

5. Then, please click the check mark on the storage section that you want to clone or copy. As shown below.

How to Clone Windows 10 to HDD or SSD

6. Then, you can also choose additional options in the Advanced Options section. Please click Advanced Options, as shown below.

How to Clone Windows 10 to HDD or SSD

7. Here you will be presented with 3 choices for you.
  • Optimize for SSD: You can select this if the destination hard disk is an SSD type.
  • Sector by sector clone: You can select this if the source and destination hard disks are the same size. If it's different then there's no need. Or if the source partition that is cloned does not have bad sectors problems.
  • Create a portable windows USB drive: You can choose this if you want to make windows portable, but unfortunately you can choose this option if you are using the premium version.
Then, please click OK if you have selected it or Cancel if you don't choose.

How to Clone Windows 10 to HDD or SSD

8. Then, please click Proceed to start the cloning process.
  
How to Clone Windows 10 to HDD or SSD
 
10. Wait until the cloning process is complete.

Thus this article that I discuss about how to clone Windows 10 to HDD / SSD. The method is very easy, isn't it. The length of time for the cloning process depends on how big the partition you are cloning is, the bigger it is, the longer it is. That is all and thank you.

Tuesday, October 13, 2020

How to Fix a Flashdisk Request Continuous Formatting without Losing Data

How to Fix a Flashdisk Request Continuous Formatting without Losing Data

Flashdisk is a very useful item for storing data. There are indeed other data storage media such as hard drives and memory cards. But until now the flash is still the best choice to carry anywhere because it has a minimal size and has a large storage capacity. Memory card or external memory can actually be taken anywhere.

How to Fix a Flashdisk Request Continuous Formatting

However, to open the data in memory usually still requires a card reader. Unlike the flash, where you just plug it directly into a computer or laptop. Besides functioning to store data, it turns out that the flash also has other functions. You can use a flash disk to back up your important data in case the data on your computer or laptop suddenly gets an error or is lost.

How to fix the Flashdisk Request Continuous Formatting


But sometimes the flash you are using has an error where the flash drive keeps asking to be formatted and can't be accessed. For how to deal with the flash, ask for continuous formatting, there are 2 ways you can do it, for more details, you can listen to the steps below.

A. How to fix the Flashdisk Request Continuous Formatting using CMD

1. Here I have a 16GB flashdisk (original size 14GB) with a drive letter h :. When I clicked it, it kept asking to be formatted so I couldn't access it.

How to fix the Flashdisk Request Continuous Formatting using CMD

2. The first solution to solve the problem of a flash that asks for continuous formatting can be done through CMD (Command Prompt). Please open CMD on the Start Menu. Then select Run as administrator.

How to fix the Flashdisk Request Continuous Formatting using CMD

3. Then run the following command:

chkdsk / f / r / x h:

h: here is a flash drive letter (step no. 1) and it could be different from mine.

How to fix the Flashdisk Request Continuous Formatting using CMD

4. Wait for the process to complete. If so, just close the Command Prompt window and try to access the flash, it's normal or not.

How to fix the Flashdisk Request Continuous Formatting using CMD

B. How to fix the Flashdisk Request Continuous Formatting using TestDisk

1. This second solution is quite potent and is most often practiced and works a lot. First download the TestDisk software via this link. After that extract the file then click 2X testdisk_win.

How to fix the Flashdisk Request Continuous Formatting using TestDisk

2. Then press the down arrow key and select No Log and then press Enter.

How to fix the Flashdisk Request Continuous Formatting using TestDisk

3. After that, select your flashdisk, you can see it from the GB size. Then press Enter.

How to fix the Flashdisk Request Continuous Formatting using TestDisk

4. Select Intel, then press Enter.

How to fix the Flashdisk Request Continuous Formatting using TestDisk

5. Select Analyze and press Enter.

How to fix the Flashdisk Request Continuous Formatting using TestDisk

6. Select Quick Search then press Enter. Wait for the process to complete.

How to fix the Flashdisk Request Continuous Formatting using TestDisk

7. At this point, use the right-left arrow keys and change * to P.

How to fix the Flashdisk Request Continuous Formatting using TestDisk

8. It will be like this. Then press Enter.

How to fix the Flashdisk Request Continuous Formatting using TestDisk

9. Then you select Write and press Enter.

How to fix the Flashdisk Request Continuous Formatting using TestDisk

10. Type Y to continue.

How to fix the Flashdisk Request Continuous Formatting using TestDisk

11. Next you select Rebuild BS then press Enter.

How to fix the Flashdisk Request Continuous Formatting using TestDisk

12. Then you select Write then press Enter.
13. Type Y to continue. After that, close the TestDisk window then try to access your flash, it's normal or not.

How to fix the Flashdisk Request Continuous Formatting using TestDisk

Cause Flashdisk Request Format


Same with other storage media. Flashdisk can also have problems. One flash problem that you can experience is that it asks to be formatted. Then what causes your flash to ask for formatting? In the following, we will provide the answers.

1. There is an Unknown File System
The first cause of the flash that asks to be formatted is that your flash disk has a system file that your PC cannot recognize. This is related to the operating system used. For the Windows operating system, in general it supports 3 different types of formats, namely NTFS, FAT32, and exFAT.

If you plug in a flash drive that was previously embedded in the Linux operating system, chances are the flash has an ext2 or ext3 format which is suitable for Linux. However, when plugged into a device with the Windows operating system, your device doesn't recognize it.

2. Problematic File Transfer Process
When the file is being moved, whether copied, moved, or saved, do not let this process be interrupted. This can result in loss of data or can cause the file to become corrupted. Usually this condition occurs when suddenly the flash is removed even though it is moving files. It could also be caused by the PC suddenly shutting down.

3. Exposed to a Virus
The cause of the flash request to format can also be due to a virus problem. Actually, not only flash, but hardware affected by virus can also experience problems. Each problem can vary. One of them is a flash that asks for formatting. It is possible that the virus entered when you plugged your flash drive into a computer or laptop.

Those are the tips that I can discuss this time about How to Fix a Flashdisk Request Continuous Formatting. Another function of the flash is that it can be used as an operating system installation media. Maybe you've seen or maybe you are one of the people who use this function. When compared to having to use a CD cassette, flash is a more effective medium. The operating system installation process will be much faster than via CD. However, to make the flash, you have to do some certain ways so that the flash is bootable. That's all and good luck.

Sunday, October 11, 2020

How to Update Computer or Laptop Drivers to Always Up to Date

How to Update Computer or Laptop Drivers to Always Up to Date

Checking and updating your computer or laptop drivers so they are always up to date is an important thing to do. With Up to Date Computer or Laptop Drivers, the performance of the Computer and Laptop itself will be better. Moreover, to support the running of new application programs which of course will run more optimally with drivers that match the updated version of the application itself.

How to Update Computer or Laptop Drivers to Always Up to Date

One of the easiest to use applications that can be used to check and update your computer or laptop device drivers is Driver Booster. Driver Booster is a well-known driver update application and is widely used by computer and laptop users, especially those who have a hobby of playing games.

How to Update Computer or Laptop Drivers to Always Up to Date

To be able to update Computer and Laptop Applications and Drivers using Driver Booster in full, we must use the Premium or Pro version of the Driver Booster Application which is certainly not free. For the use of the Free version of the Driver Booster application, of course, there will be limitations in its use.

How to Update Computer or Laptop Drivers to Always Up to Date

Here you can get the RC Driver Booster Latest Update Full Version Free which has been proven to be Full Premium but free and can work well like the Pro version of the application purchased using a legal license. Please download the full Driver Booster application.

How to Update Computer or Laptop Drivers to Always Up to Date

After you have successfully downloaded it, just install Driver Booster Pro by running the installer. Then after completing the install process, when the lounce Driver Booster Now checklist appears, just ignore it, close the Install window without running Driver Booster directly.

Extract the Crack File, then paste the Crack file into the install directory folder where the Driver Booster application is stored, namely in the File Program to replace the default Driver Booster application with the Crack file so that it becomes the full version later. After that, then run the Driver Booster application and check the status of your computer or laptop Driver Update.

How to Update Computer or Laptop Drivers to Always Up to Date

A list of outdated drivers will appear. Click update now to download and update drivers automatically.

How to Update Computer or Laptop Drivers to Always Up to Date

After the update process is complete, the Update Completed notification will appear and usually a Restart Now command will appear. Restart Windows to apply the full driver update install.

How to Update Computer or Laptop Drivers to Always Up to Date

IObit Driver Booster 8 RC also provides several Windows system repair tools, including as shown in the screenshot below:

How to Update Computer or Laptop Drivers to Always Up to Date

You can also increase the performance of your computer or laptop to play games by activating Game Boost mode. In addition, we can optimize Windows systems and outdated application programs.
  
How to Update Computer or Laptop Drivers to Always Up to Date

To clean a Windows system, you must use the Advanced System Care application. You can install this application via Driver Booster. It is also easy to update lightweight application programs installed on computers and laptops using Driver Booster. We don't need to check one by one the updated version of the installed application and we use it.

This is the tutorial on how to check and update computer or laptop drivers so that they are always up to date using the Driver Booster Pro Full Version application for free.

Saturday, October 10, 2020

How to Fix The Application Was Unable To Start Correctly

How to Fix The Application Was Unable To Start Correctly

Have either of you received the application was unabel to start correctly? From the message you received, we can already tell that this problem is related to the application that you install on your computer or laptop. Problems like this are experienced by those who use the Windows operating system. It is possible that other operating systems may also experience unused applications but with different error message contents.

How to Fix The Application Was Unable To Start Correctly

Regarding the application was unabel to start correctly, actually when you install any application such as games, multimedia, video editing, etc., there are probably two things you will get.
  • The applications you install can be used normally as usual
  • The application that you installed cannot even be used and will generate an error message
  • For the first chance it doesn't matter. You can run the application as it should. However, for error application problems, you must know about why your application cannot be opened.

Although it's possible that the installation process went well, it got an error when it opened and gave the message the application was unabel to start correctly.

Error Code : 0xc0000005, 0xc0000142, 0xc00007b, 0xc0000906 or 0xc0000142

How to fix The Application Was Unable To Start Correctly


Then what should you do to resolve this application was unable to start correctly? Below we will provide the steps for you.

1. Reinstall the .NET Framework

NET framework is a software framework that is needed when users want to run Windows-based games or applications. One way to solve the problem The application was unable to start correctly is to reinstall or upgrade your NET framework to the latest version.

Visit the official Microsoft site via this link to download the latest version of .NET Framework. Please download the one that says recommended, it indicates the .NET Framework is the latest version.

How to Fix The Application Was Unable To Start Correctly

After that, download the Offline installer version, and select Runtime.

How to Fix The Application Was Unable To Start Correctly

After the download is complete, you double click the file. After that click Yes.

Wait for the extract process to complete. And just follow the installation process.

How to Fix The Application Was Unable To Start Correctly

If so, just restart your computer or laptop. Then the application was unable to start correctly will be resolved.

2. Repair DirectX

DirectX allows an application or game to interact with the hardware on the user's computer or laptop. Sometimes DirectX has problems causing the problem The application was unable to start correctly.

Open Windows Explorer and then go to the C: \ Windows folder. After that enter the SysWOW64 folder. If you are a 32-bit Windows user, then log into System32.

How to Fix The Application Was Unable To Start Correctly

After that you need to delete the following DirectX files:

From d3dx9_24.dll to d3dx9_43.dll
d3dx10.dll
From d3dx10_33.dll to d3dx10_43.dll
d3dx11_42.dll and d3dx11_43.dll

How to Fix The Application Was Unable To Start Correctly

If it appears like this, just tick Do this for all current items. Then select Continue.

How to Fix The Application Was Unable To Start Correctly

After that you open this page to download the latest version of DirectX on the official Microsoft website. Just select Download.

How to Fix The Application Was Unable To Start Correctly

If it has been downloaded, just click the file 2X. Then the DirectX installation window will open. Select Next to continue.

How to Fix The Application Was Unable To Start Correctly

Uncheck the Install the Bing Bar option then select Next.

How to Fix The Application Was Unable To Start Correctly

Wait for the installation process to complete. Make sure you stay connected to the internet. Then restart your computer or laptop and run the desired application without fear of the problem appearing again.

How to Fix The Application Was Unable To Start Correctly

3. Repair Microsoft Visual C ++ Redistributables

Open Control Panel via the Start Menu.

How to Fix The Application Was Unable To Start Correctly

Then you select Uninstall a program.

How to Fix The Application Was Unable To Start Correctly

In the search box located at the top right corner, enter Microsoft Visual C ++. A collection of Microsoft Visual C ++ packages will appear as shown below.

How to Fix The Application Was Unable To Start Correctly

Select a package then select Change.

How to Fix The Application Was Unable To Start Correctly

After that you select Repair then select Yes. Wait for the repair process to complete.
Note: You must repair the entire Microsoft Visual C ++ package one by one.

How to Fix The Application Was Unable To Start Correctly

If you have everything, then you need to restart your computer or laptop. After that try running the application or game you want.

4. Reinstall Microsoft Visual C ++ Redistributables

If the repair is not working and the message The application was unable to start correctly still appears, then you will need to reinstall it in Microsoft Visual C ++ Redistributables.

Click Uninstall on the entire Microsoft Visual C ++ Redistributables package one by one.

How to Fix The Application Was Unable To Start Correctly

After that you download the latest version of Microsoft Visual C ++ Redistributables via this link. After that, install Microsoft Visual C ++ Redistributables as usual. Then restart your computer or laptop.

How to Fix The Application Was Unable To Start Correctly

Recognizing The Application Was Unable To Start Correctly


Regarding the application was unabel to start correctly, this message actually says 0xc0000005, 0xc0000142, 0xc00007b, 0xc0000906 and 0xc0000142. That means, the code indicates a problem with your application. What causes the application to display this message? Here is the answer.

1. Applications that are damaged
The cause of the error 0xc000007b or this application was unable to start correctly is because the application is corrupted. Before installing, it's possible that one or more parts of the application are already problematic.

So, you can't install it on your computer or laptop. It is also possible that you can successfully install the application until the process is complete. But when you want to open it, the message 0xc000007b appears.

2. Applications Installed Wrong Version
The second reason is because you have chosen the wrong version of the application to install. Maybe you actually need a 32-bit type application, but you instead install a 64-bit type application. Even though this problem is actually rare, it doesn't mean your device doesn't have the potential to experience this problem.

3. System Problems
Apart from the two causes above, the cause of this application was unable to start correctly is due to a problem with the system. Maybe the application you installed is not compatible with Windows systems. So you have to install the latest version. It could also be due to other system problems such as related to the .Net Framework.
 
Hopefully the guide on how to resolve this application was unable to start correctly above was helpful and easy to apply. If you have anything to ask, we can discuss it in the comments box.