How to Fix Corel Draw Has Stopped Working in Windows 10, 8 and 7 for All Versions of CorelDRAW? Regardless of the version used, be it CorelDRAW Suite 2019, 2018, 2017 or X9, x8, x7, x6, X5 or even the older versions, this professional graphic editor software has a relationship that causes various problems for many users. For example, many people have received an error stating that CorelDRAW has stopped working in Windows 10. The same problem sometimes appears in previous iterations of OS or operating systems.
Includes Windows 8 and 7, on both their x64 (64-Bit) and x86 (32-Bit) platforms. Fortunately, you can solve and fix these common problems with a variety of proven solutions. In this post, we will discuss some solutions and ways to solve CorelDRAW which suddenly stops working with the has stopped working error message depending on what platform you are currently using (choose according to your needs). the review!
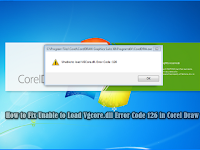
CorelDraw Has Stopped Working Error Message
A few days ago, we got this message on our computers that have Windows OS. We work with this software as usual, but after a while we continue to work, there is always a problem with the has stopped working notification, which sometimes appears a few moments after starting the software other than pirated detection or viewer mode which usually occurs when we connect CorelDRAW to the internet.
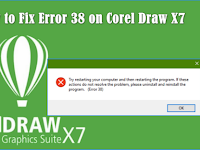
This problem also occurs in Corel Photo-Paint and even the error message appears immediately after clicking the application icon to start it. Some error messages or error messages that you might get if you experience problems like us above. In fact this also applies to all other versions, such as X4, X5, X6 or even X8 and X9 such as:
This can occur in several versions of CorelDraw as we have explained above with a comma. However, problems like this usually occur in X5 and X8 versions.
How to Fix Corel Draw Has Stopped Working on Windows 10, 8 and 7
To overcome this, there are several types of methods that you need to know. Here we have collected 7 (seven) alternative ways to overcome Corel DRAW has stopped working that you can do as a solution as follows:
1. Reset CorelDRAW to Factory Settings or Factory Settings
The first way to solve the CorelDRAW has stopped working error message, which we will discuss here, is quite easy to do where this method has proven to be a successful solution on the X5 version. To start with, the user is required to open the CorelDRAW software first.
Then press and hold the F8 key, and open a new drawing page. So after the application will ask and ask if you want to reset or reset CorelDRAW to factory default. Continue by pressing the Yes button.
When the process is complete, your software will be as good as new. Depending on the version of CorelDRAW you have installed, this solution may not be available in the latest CorelDRAW suite. However, it has been confirmed to work on CorelDRAW X5.
2. Rename the .dta file
The next way is to rename the .dta file, as reported by various professionals, there is an important .dta file used by CorelDRAW that is damaged and needs to be renamed. The procedure is quite annoying and may have to be applied every time the user opens the app.

Following are the steps you can follow to rename and rename the file:
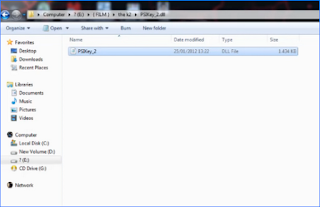
- Open Windows Explorer like the image you see above, We are using the X7 version of Corel.
- In general, you can navigate to C:\Users\All Users\Corel\CorelDRAW Graphics Suite\ and note that the last part of the path above may vary depending on the version of CorelDRAW you are using. For example, if you installed CorelDRAW x8, the path would be C:\Users\All Users\Corel \CorelDRAW Graphics Suite X8\ (for X8 version)
- In this folder the file name is DR18s.dta. Rename this file to something else, such as new_DR18s.dta.new (to allow the system to ignore its existence).
- Open CorelDRAW and login (if you are using the original version). So, the application should start working properly.
- Close the application and return the file name that you changed above back to its original state.
- Done, your CorelDRAW will continue to work as usual.
When renaming files, some users may receive warnings or warnings, stating that this may cause instability issues. Select ignore the prompt and just move on.
Also, depending on the version, the file may be found at:
C:\ProgramData\Corel\CorelDraw Graphics Suite
Note: This solution has been confirmed to work on CorelDRAW X8 and 2017 (CGS2017), it's just that in the last version, X9, the file name is DR19s.DTA. The numbering convention in the last section is closely related to the product version you are using.
3. Refresh the Corel Folder
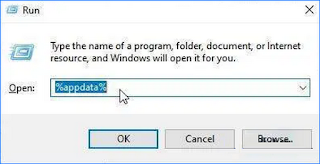
In the same way as we previously explained above, a user can also rename the entire Corel folder, which is found in the AppData folder. The fastest way to enter the folder is to type the command as shown below.
As we mentioned above, since this folder is usually hidden in Windows, here's how to find it and fix it:
- Open the Start menu and type Run. Click on the application.
- In the Run window type %appdata% and press Enter.
- Navigate to the Corel folder and open it.
- Inside there will be a special folder for the version of CorelDRAW that is currently installed. For example, a valid name is CorelDRAW Graphics Suite x7.
- Rename this folder with something else such as CorelDRAW Graphics Suite x7 ABC.
- Go ahead and run the CorelDRAW application.
At this stage make sure you have done it like the image below.
If the application runs correctly, you can delete the old folder from the system, because the new folder has been created by the system.
4. Check CorelDRAW Drawing Elements
Those who usually have problems with CorelDRAW, when opening a single file should note that sometimes a single graphic element can cause the following issues or problems:
CORELDRAW HAS STOPPED WORKING. A PROGRAM CAUSED THE PROGRAM TO STOP WORKING CORRECTLY. WINDOWS WILL CLOSE THE PROGRAM AND NOTIFY YOU IF A SOLUTION IS AVAILABLE.
This is a common problem with CorelDRAW X5 and can be found in other versions (X9, X8, X7 or X6). In theory, these elements cause the program to crash or hang. Here are some suggestions on how to identify troublesome graphic elements and how to fix them:
- The Corel DRAW image package always creates a backup or backup file of any project. Find a backup of the cause and save it again under a different name, using the .cdr extension on the search.
- Another thing to do with the backup file is to export it as a .cmx file, open a new file and re-import the .cmx into it. After that, save it using a new file name.
- Even though it is quite difficult, another idea and trick you can try is to manually delete any grouped effects or transformations applied to the object.
5. Repair CorelDRAW using the Installation Kit
The next way to solve it is to repair your Corel installation again. Run your CorelDRAW installation .exe file, this you can usually find on the CorelDRAW DVD you just purchased (or from the installation package you downloaded).
Windows 10, 8.1, 8 and 7 operating systems will usually detect that a version is already on the computer and then a new menu and display will appear asking the user if you want to modify, repair or remove the installation. this time.
To fix this, continue by selecting the repair option. In theory, this solution will verify all the files currently found in the installation folder and add a few other files (which may be lost due to virus or malware).
6. Update Microsoft Windows
Another possibility that we are considering here is that CorelDRAW has problems that have stopped working or has stopped working due to compatibility issues with Windows files.
On the other hand, CorelDRAW relies on the .NET framework to function so that updates or the latest version must always be had. It doesn't matter which version is installed, be it Windows 7, 8, 8.1 and especially Windows 10, make sure that all updates or updates have been obtained by your computer.
To check for updates, Windows 10 and 8 users must press the Windows key and type update in the search box. In the menu that appears, hit the check for updates button and see if there is any new update available. Meanwhile, those who use Windows 7 should check for updates directly from the control panel menu.
7. Re-Install CorelDRAW
The way to solve Corel DRAW with the last has stopped working error message that we will discuss here is to reinstall the Corel software itself. Usually, this is the simplest solution but it can dramatically fix the problem. To do so, make sure the user has to manually uninstall CorelDRAW, restart the PC and run the installation files again and make sure this time the application is installed correctly and without errors.
With several ways to fix Corel Draw Has Stopped Working in Windows 10, 8 and 7 for all versions of CorelDRAW that you can try to practice right now. Regarding the version of the graphic suite you use some of the remedies may be different. Our advice personally, you should try step 7 (seven) first before starting trying other solutions related to technical problems. Where this sometimes makes ordinary people lazy to do it.


